
Author: Matt Spitzer | Updated August 2026
Growing cannabis indoors comes down to one tradeoff: money buys control. You can get a plant from seed to harvest in a $150 setup, and plenty of people do it every year. Spend more, and you buy yourself more control over temperature, humidity, airflow, and light, which means more consistent results and less troubleshooting along the way.
This guide is built around that tradeoff. If you want a straightforward path, follow the cookie cutter setup in each section and you’ll have everything you need without digging further. If you want to understand the why behind each piece of equipment, the “Going Deeper” parts of each section are for you. Either way, you’ll come out the other end with a setup that fits your budget and your goals.
Keep in mind this is a brief overview of each topic, meant to get you oriented, not a full deep dive into any single piece of equipment. If you want to go further on a specific topic, or you’re planning a more sophisticated setup and want help getting it right, call or text us at (919) 410-6945 and we’ll walk through it with you.
Quick Answer
| Decision | Cookie Cutter Choice | Why It Matters |
|---|---|---|
| Space | 2×2 or 2×4 grow tent | Contains light, smell, and mess in a small footprint |
| Light | LED kit sized to your tent (Spider Farmer, AC Infinity, Vivosun) | Runs cool, sips power, plug and play |
| Airflow | Inline exhaust fan with carbon filter | Removes heat and humidity, controls smell |
| Temperature and humidity | Basic digital thermometer/hygrometer, adjust fan speed by hand | Keeps plants in a safe range without extra spending |
| Containers and soil | 3 to 7 gallon fabric pots, quality potting mix + fertilizer | Enough root space for a full indoor cycle |
| Control upgrade path | Add an environmental controller (Trolmaster, AC Infinity Controller) when ready | Automates what you were doing by hand |
Table of Contents
- The Framework: Budget vs. Control
- Picking Your Space
- The Cookie Cutter Setup: All-in-One Kits
- Lighting
- Environmental Control: Temperature, Humidity, Airflow, and CO2
- Controllers: Automating Your Environment
- Smell Control
- Soil, Containers, and Watering Indoors
- What to Expect Through an Indoor Grow Cycle
- Common First-Grow Mistakes
- FAQ
The Framework: Budget vs. Control
Every decision in an indoor grow sits somewhere on a spectrum between cheap and simple on one end, and expensive and automated on the other. Neither end is wrong. A $300 tent kit with a manual thermometer can produce a great harvest if you’re willing to check on it daily and make small adjustments by hand. A $2,000 setup with a full environmental controller does a lot of that work for you, and gives you more room for error if you travel or get busy.
The honest way to think about it: your first grow doesn’t need to be your most expensive one. Start with a setup that matches how much hands-on attention you want to give it, and upgrade specific pieces as you learn what actually limits your results. Most new growers hit a ceiling on temperature or humidity control before anything else, which is why that’s where most of the money goes as people scale up.
We’ll walk through each part of the setup in that order: space, light, airflow and climate, and smell. At each step we’ll give you the cookie cutter answer first, then go deeper for anyone who wants to understand the tradeoffs.
Picking Your Space
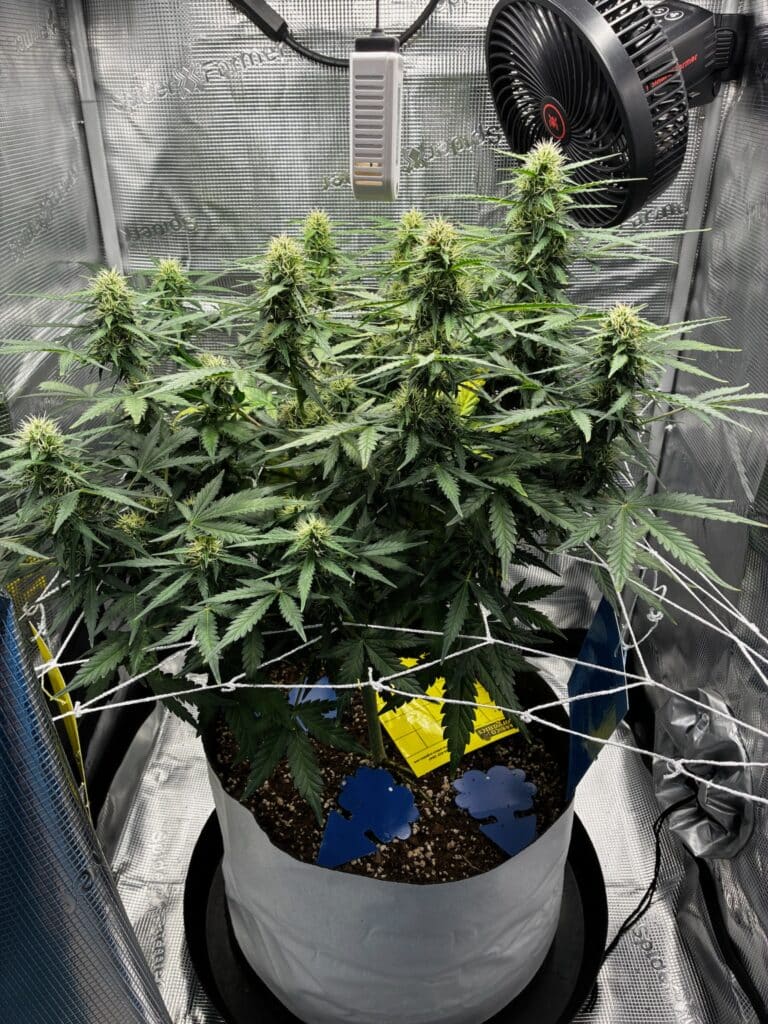
Cookie cutter: A 2×2 or 2×4 foot grow tent fits one to two plants and works in a closet, spare room, or garage corner. Tents come with reflective interior walls, port holes for cords and ducting, and a frame that supports lights and fans without extra hardware.
Going deeper: If you have a dedicated room, a tent isn’t required. A tent’s main advantages are containment (light, smell, and humidity all stay put) and simplicity (everything is sized to fit together). A room gives you more space to scale up over time but means you’ll need to manage light leaks, ducting, and smell control across a bigger area. For a first grow, a tent removes most of the guesswork.
Size your tent to your light and your goals. A 2×2 tent suits a single plant grown to a moderate size. A 2×4 or 4×4 fits two to four plants depending on how much you train and space them. Bigger tents need more light, more airflow, and more of everything else in this guide, so match your tent size to what you’re ready to manage.
The Cookie Cutter Setup: All-in-One Kits
If you don’t want to piece together a light, tent, and fan separately, all-in-one kits solve that. Brands like AC Infinity, Spider Farmer, and Vivosun sell complete packages that bundle a tent, an LED light, an inline fan, and ducting sized to work together. You unbox it, assemble it, and plug it in.
These kits remove the guesswork of matching component sizes (a fan that’s too small for your tent, a light that’s too strong for your space) and they’re a reasonable way to get started without researching every individual part. Expect to pay more per component than buying separately, but you save the time and risk of mismatched gear.
Going deeper: Once you’ve run a kit and know what you’d change, that’s usually the point to start replacing individual pieces (a stronger light, a quieter fan, an environmental controller) rather than buying another full kit. Most of the sections below walk through what to look for if you go that route.
Lighting
LED is the standard for indoor cannabis lighting at this point, and for most new growers it’s the right call. LEDs run cooler than older HPS (high pressure sodium) or metal halide setups, use less electricity for the light they produce, and generate less heat that you then have to remove from your tent. Less heat load means simpler climate control, which matters more than most new growers expect.
Cookie cutter: Buy an LED light sized to your tent footprint from the same brand as your tent, or from AC Infinity, Spider Farmer, or Mars Hydro. Most manufacturers list recommended wattage by tent size (roughly 30 to 50 watts of actual draw per square foot for a full cycle from seedling through flower). Follow their sizing chart and hang the light at the height they recommend.
Going deeper: Look at the light’s PPFD (photosynthetic photon flux density) map if the manufacturer provides one, not just total wattage. Two lights can list the same wattage and cover a grow space very differently depending on how evenly the light spreads. Dimmable lights let you start seedlings at lower intensity and ramp up as plants mature, which reduces stress on young plants. Most quality LED fixtures now include built-in dimmers and a mix of light spectrums tuned for the vegetative stage and flowering.
Environmental Control: Temperature, Humidity, Airflow, and CO2
This is where most of the difference between a decent harvest and a great one gets decided. Cannabis is forgiving of small swings but punishes prolonged stretches outside its comfort zone, especially during flowering.
Temperature: Aim for 70 to 80°F during light hours and allow it to drop slightly at night. Heat stress from lights or a poorly ventilated tent shows up as curling leaves and slowed growth. An inline exhaust fan pulling hot air out of the tent is the main tool for keeping temperature in range.
Humidity: Target 60 to 70% relative humidity during the vegetative stage, dropping to 40 to 50% during flowering. High humidity during flowering is the leading cause of bud mold, so this is the number worth watching most closely as plants mature. A small humidifier or dehumidifier, sized to your tent, gives you control in either direction.
Airflow: Air needs to move both out of the tent (exhaust) and around the plants (circulation). An inline fan connected to ducting handles exhaust, pulling stale, warm air out through your carbon filter. A small clip fan or oscillating fan inside the tent keeps air moving across the leaves, which strengthens stems and helps prevent mold from settling on flowers.
CO2: This is the one piece most new growers can skip. Supplemental CO2 only helps once your light, temperature, and airflow are already dialed in, since it becomes the limiting factor for growth only after everything else is optimized. It’s worth adding once you’re running a sealed, controlled tent and want to push output further, not before.
Cookie cutter: A basic digital thermometer/hygrometer (under $15) and an inline fan on a manual speed controller gets you a workable range. Check it daily and adjust the fan speed or crack the tent vents if temperature or humidity drifts.
Going deeper: As your setup grows, checking and adjusting manually gets tedious and easier to miss. That’s where controllers come in, covered next.
Controllers: Automating Your Environment
A controller takes the manual checking out of environmental control. Instead of you watching a thermometer and adjusting a fan by hand, sensors feed data to the controller, and the controller adjusts your fan speed, humidifier, dehumidifier, and lights automatically to hold your target ranges.
Cookie cutter: Many all-in-one kit brands, including AC Infinity, sell their own basic controllers that plug directly into their fans and work well for a single tent.
Going deeper: Trolmaster is the option serious growers reach for when they want a single system managing several devices and multiple environmental factors at once, temperature, humidity, CO2, and lighting schedule included. It costs more and has more of a learning curve than a basic plug-in controller, but it gives you the tightest control and is built to scale if you add more tents or a full room down the line. For a single first tent, a basic controller is plenty. A Trolmaster-level system starts to pay off once you’re running multiple tents or you want set-and-forget reliability while you travel.
This is the clearest example of the budget-to-control tradeoff in this whole guide. A $15 thermometer and daily manual checks can get you through a solid first grow. A few hundred dollars on a controller buys back your time and tightens your results, and that’s a fair trade once you know you’re sticking with indoor growing.
Smell Control
Cannabis, especially in flower, produces a strong smell that will fill a house if it isn’t contained. A carbon filter attached to your inline exhaust fan is the standard fix. Air gets pulled through the tent and through the filter’s activated carbon before it’s exhausted into the room, which strips out the odor.
Cookie cutter: Buy a carbon filter sized to match your inline fan’s airflow rating (measured in CFM), from the same brand as your fan when possible so the fittings match. Most all-in-one kits already include a properly sized filter.
Going deeper: Filters lose effectiveness as the carbon saturates, typically after 12 to 18 months of regular use, so budget for a replacement if you’re running multiple cycles. Undersizing your filter relative to your fan is the most common mistake, since air that moves too fast through the carbon doesn’t get fully scrubbed. When in doubt, size the filter to match or slightly exceed your fan’s CFM rating.
Soil, Containers, and Watering Indoors
Indoor growing gives you full control over your growing medium, which is one of its biggest advantages over growing outdoors. A 5 to 10 gallon fabric pot filled with a quality potting mix gives most indoor plants enough room for a full cycle from seedling to harvest. See our soil guide for specific mix recommendations and our pot size guide for sizing by plant type.
Water when the top inch or two of soil is dry, at the base of the plant, until you see a little runoff from the bottom of the pot. Indoor plants under lights and fans tend to dry out faster than you’d expect, so check soil moisture by hand rather than on a fixed schedule.
If you’re feeding with liquid nutrients, checking pH matters even more indoors than outdoors since indoor grows rely entirely on what you feed them rather than what’s naturally in outdoor soil. See our pH guide and fertilizer guide for full feeding schedules.
What to Expect Through an Indoor Grow Cycle
Germination and seedling stage (1 to 2 weeks): Start seeds using our germination guide. Seedlings need lower light intensity and consistently warm, humid conditions.
Vegetative stage (3 to 8 weeks): Plants put on size and root structure. This is when you’ll dial in your environment and get comfortable adjusting your fan, light height, and feeding schedule. Length depends on how large you want the plant before flipping to flower.
Flowering (7 to 10 weeks): Switching your light to a 12 hours on, 12 hours off schedule triggers flowering in photoperiod strains. This is when humidity control matters most, since dense, developing buds are the most vulnerable point for mold.
Harvest: Buds are ready when trichomes shift from clear to mostly cloudy, typically signaled by the strain’s listed flowering time. From there, drying and curing properly makes as much difference to the final product as the grow itself.
Common First-Grow Mistakes
Undersizing the exhaust fan. A fan that can’t move enough air leaves heat and humidity with nowhere to go, and this is the single most common cause of a stalled or struggling indoor grow.
Skipping the carbon filter to save money. Smell complaints are one of the most common reasons new growers run into problems with neighbors or landlords. Budget for the filter from the start.
Checking humidity but not tracking it. A single reading tells you very little. Watch the trend over days, especially heading into flower.
Placing the light too close or too far. Follow the manufacturer’s hanging distance and adjust as the plant grows. Too close causes light burn, too far slows growth.
Overwatering. The same rule applies indoors as outdoors: let the soil dry out between waterings and check by hand instead of on a fixed schedule.
Buying an environmental controller before you need one. If a $15 thermometer and daily checks are keeping you in range, that money is better spent on light quality or genetics first.
Thinking about growing but not sure what gear to buy? Check out this list of growing supplies we recommend. Ready to pick strains for your setup? Browse our seed catalog.
FAQ
How much does it cost to set up an indoor grow? A basic tent, LED light, and inline fan with a carbon filter runs roughly $200 to $400 for a 2×2 or 2×4 setup. Adding an environmental controller and other upgrades can push a full setup to $1,000 or more, but it isn’t required for a successful first grow.
What size tent do I need? A 2×2 tent fits one plant comfortably. A 2×4 fits two to three. A 4×4 fits three to four depending on training and spacing. Size up if you plan to grow multiple plants or train them wide.
Do I need CO2 for indoor cannabis? No, not for a first grow. CO2 only helps once your light, temperature, and airflow are already well controlled, so it’s worth adding later rather than at the start.
How many watts do I need per square foot? As a rough guide, plan for 30 to 50 watts of actual LED draw per square foot for a full cycle from seedling through flower. Check your specific light’s manufacturer guidance, since coverage varies by fixture.
Do I need a carbon filter? Yes, if smell is a concern in your home. Cannabis in flower produces a strong smell, and a properly sized carbon filter on your exhaust fan is the standard, reliable fix.
Can I grow indoors without an inline fan? Not well. Without active exhaust, heat and humidity build up quickly, especially once you add a light and multiple plants. An inline fan is one of the few pieces of equipment we’d never recommend skipping.
Is a Trolmaster controller worth it for a first grow? Usually not. It’s built for growers running multiple tents or who want full automation. A single first tent does fine with a basic plug-in controller or manual checks, and you can always upgrade once you know indoor growing is something you’ll stick with.
About the Author

Matt, Co-Founder of Triangle Seeds — Matt has been growing commercially since 2013 alongside co-founder Chase. Over a decade, Triangle Seeds has sold over a million seeds to home growers and hemp farmers across the US. We ship nationwide. Call/text (919) 410-6945. Learn more
We have a video series with cannabis content creator Catherine Goldberg, aka Senior Savvy Cannabis, where we guide her through her first indoor grow. If you are a new grower, you might find the videos helpful. Watch the grow videos →